The Options dialog opens.
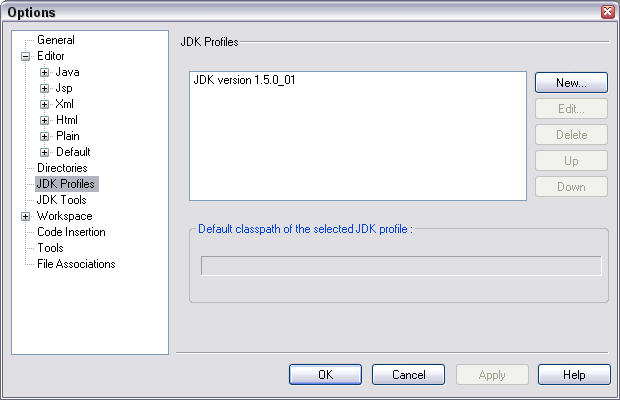
Figure 1: The Options dialog.
On the right side of the Options dialog, you see the name of a JDK profile. The name is something like JDK version 1.5.0_01.
The Select Path dialog appears.
My Java home directory is named C:\Program Files\Java\jdk1.5.0_01. Most likely, your Java home directory's
has a similar (but slightly different) name.
The JDK Profile dialog appears. (See Figure 2.) This dialog list the names of several classes, sources, and documentation files.
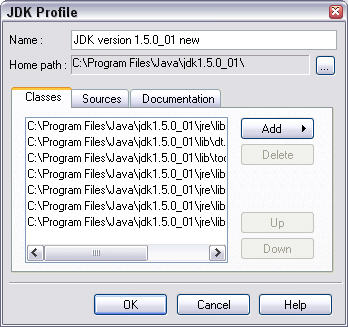
Figure 2: The JDK Profile dialog.
In Figure 2, I add the word new to the default name.
The Options dialog comes to the fore. On the right side of the Options dialog, you see a brand new JDK profile. (See Figure 3.)
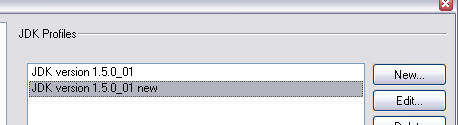
Figure 3: The JDK Profile dialog contains a new profile.
Your newly created profile moves up in the list of profiles. (See Figure 4.)

Figure 4: Your new profile moves up to become the default profile.